M&M Equipment – Service Bulletin
Elho Model 710 – Updated Rake Rotor Install Instructions
Kit # 473192
Attention: Please use proper tools, lifting equipment, stands, blocking and shop protocol to avoid injury and damage.
Removal
- Fold rakes down into field position and block the cutting edge so the rake tines are just off the ground. Make sure all hydraulic pressure is relieved from the machine before performing any work. Make sure lift cylinder lockout valve is in the locked position before performing any work.
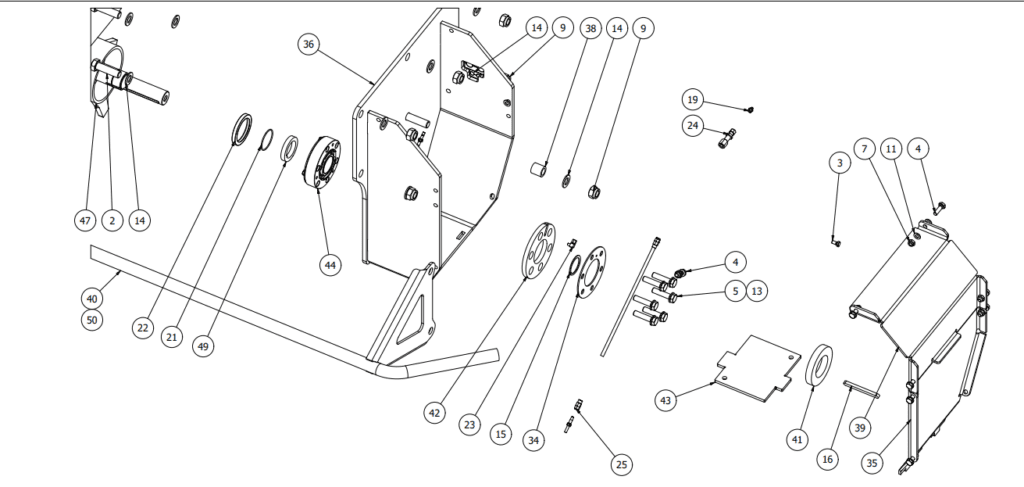
- Remove the access covers (#39,35) on the outside of each rake. Remove the safety bar (#40) at the front of each rake.
- Remove hydraulic lines from rake gear box drive motor, remove hydraulic hose clamp from rake end housing (#36) and remove lines from housing. Be cautious when removing lines due to possible hydraulic oil pressure.
- Remove the centre bolt and washer holding the gear box to the rake shaft, remove gear box assembly. Remove drive key (#16).
- Support outer end of rake rotor. On outside end housing remove grease line (#25), remove 6 bolts (#5) holding the bearing to the end housing, remove cover plate (#34) and seal (#42), remove bolts holding the end housing to the rake frame. Remove the end housing.

- Support the inner end of the rake rotor, in the inner rake frame remove the 6 bolts highlighted below.

- Move rake rotor towards the outside of the machine to remove. This process applies for both left and right hand rake rotors.
Installation of New Rake Rotors
- Determine left and right hand new rake rotors, right hand rake rotors is marked with a welded “H” on the inner tube of the rake rotor, near the inside rake rotor flange. Shown below.

- Install new bearings on rotors, bearings are provided with the update kit, use red loctite on the set screws. New o-ring (#21) is also provided for the outer rake bearing.
- Move rake rotor into inner rake frame, re-install the 6 bolts (highlighted above) holding the bearing to the inner frame, use red loctite on the bolts.
- On the outside of the rake frame, re-install the rake end housing (#36), re-install rake safety bar, re-install oil seal, spacer and cover plate, re-install 6 bolts (#5) holding bearing to end housing. Use red loctite on all bolts. Re-install grease line.
- Before re-installing the gear box change the gear box oil if required (use 80w90 oil), re-install drive key, re-install gear box, re-install centre washer and bolt.
- Re-install hydraulic drive motor lines, re-install hyd hose clamp.
- Hook picker to power unit and run to verify proper function, check for leaks and verify machine functions properly.
- Re-install end housing access covers. Grease machine prior to use.
Kit #473192 includes – light hand rake rotor, right hand rake rotor, inner and outer bearings for each rake, o-ring for outer bearing for each rake.
For questions please email: [email protected]
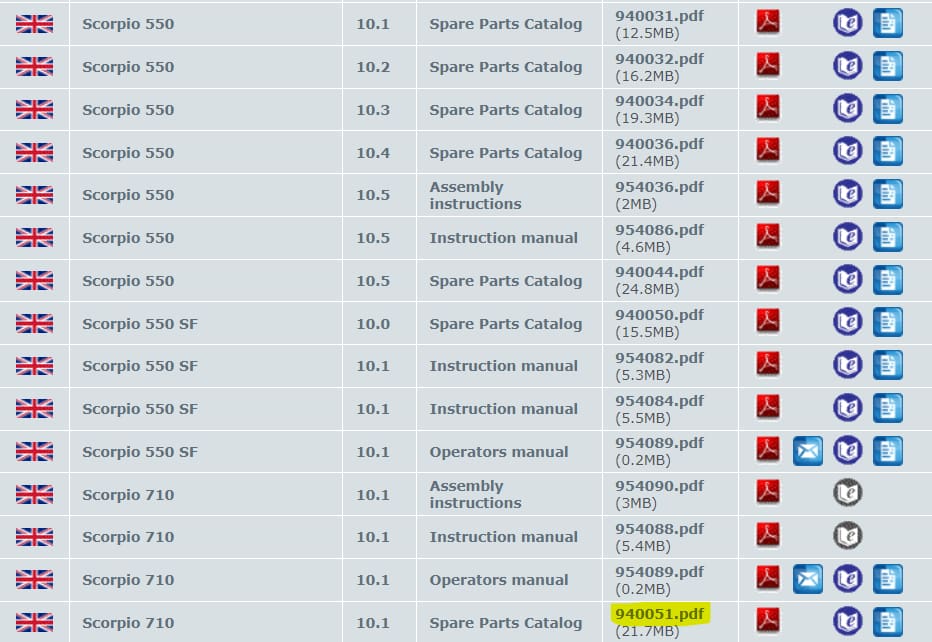
Elho 710 Model Parts Book: https://download.elho.fi/main.php?id=1896474
Click the link above, then click highlighted tab shown below for access to the parts book.


